When migrating specific file types or data from a mapped network drive using a multi-server CloudM Migrate deployment, it is crucial that the mapped drive is accessible by the SYSTEM user. This guide explains why this is necessary and provides step-by-step instructions for configuring such drives.
Applicable Migration Scenarios
This configuration is required for migrating the following file types and sources when accessed via a mapped drive in a multi-server environment:
- PST files
- EML files
- MBOX files
- GroupWise archives
- NSF files (Lotus Notes archives)
- File system or NAS (Network Attached Storage) files
Understanding SYSTEM User Access
CloudM Migrate services run under the SYSTEM user account on your migration servers. Standard network drive mappings, created by a regular Windows user and visible in File Explorer, are typically not accessible by the SYSTEM user. For CloudM Migrate to successfully access the source data, the network drive mapping must also be established under the SYSTEM user context.
Key Requirement
- The same drive letter (e.g.,
Z:) and network path (\\servername\sharedfolder) must be mapped identically on both the Primary and all Secondary migration servers.
Step-by-Step Guide: Create a Mapped Network Drive using SysInternals PSTools
Follow these steps on each CloudM Migrate server (Primary and Secondary) that needs to access the network share:
-
Download and Extract PSExec:
- Download the
PSExec.zipfile from the official Microsoft SysInternals website: https://docs.microsoft.com/en-gb/sysinternals/downloads/psexec - Extract the contents of the
PSExec.zipfile to a known, easily accessible location on your migration server (e.g.,C:\PSTools).
- Download the
-
Open an Elevated Command Prompt:
- Search for "Command Prompt" in the Windows Start menu.
- Right-click on "Command Prompt" and select "Run as administrator".
-
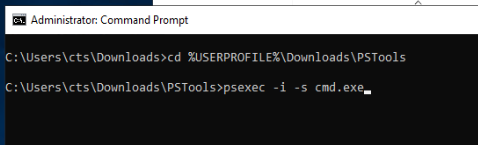
Navigate to the PSExec Folder:
- In the elevated Command Prompt, change the directory to where you extracted PSExec.
-
Example:
cd C:\PSTools
-
Execute PSExec as SYSTEM:
- Run the following command to open a new Command Prompt window that operates under the SYSTEM user account:
Bashpsexec -i -s cmd.exe - A new, separate Command Prompt window will launch. This new window is running with SYSTEM privileges.
- Run the following command to open a new Command Prompt window that operates under the SYSTEM user account:
-
Verify SYSTEM User (Optional but Recommended):
- In this new SYSTEM Command Prompt window, type:
Bash
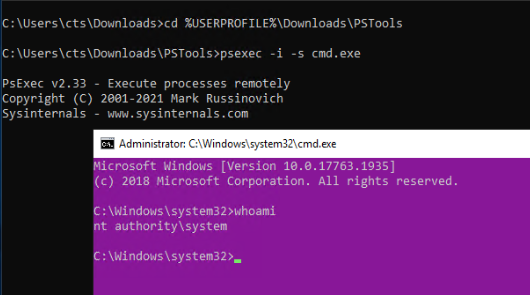
whoami - The output should display
nt authority\system, confirming that the command prompt is running as the SYSTEM user.
- In this new SYSTEM Command Prompt window, type:
-
Map the Network Drive:
- In the SYSTEM Command Prompt window, use the
net usecommand to map your shared network drive. - Replace
z:with your desired drive letter and\\servername\sharedfolderwith the actual UNC path to your network share.Bashnet use z: \\servername\sharedfolder /persistent:yes -
Optional: Map with Specific Credentials: If the network share requires credentials other than those implicitly available to the SYSTEM account (e.g., a domain user account), you can specify them:
You will be prompted to enter the password for the specified user.Bash
net use z: \\servername\sharedfolder /persistent:yes /user:domain\username
- In the SYSTEM Command Prompt window, use the
Important Considerations
- Visual Indication (Red X): The mapped network drive (e.g., 'Z:') may appear with a red 'X' in File Explorer (on your desktop). This is a normal visual artifact because the drive is mapped under the SYSTEM user's context, not your interactive user profile. Despite this visual, the drive is correctly mapped and accessible by CloudM Migrate.
- Consistency Across Servers: It is crucial that the exact same drive letter and path are used on all Primary and Secondary CloudM Migrate servers involved in the migration.